We have been chosen for CAP 2019

Back in December, Jed Malcore and I applied to become one of five teams for the Craft Apprentice Program. Each team consists of a master (me) and an apprentice (Jed) who have to work together for a minimum of 100 hours from the months of March through September. In our application and follow-up interview, we had to describe how we envisioned the apprenticeship working and our expectations for it. We had decided to concentrate on bowls and hollow forms for our apprenticeship.
We must have done well enough because we have been selected to be one of the teams. I'm excited to see where we end up and I'm also excited to see where the other four teams end up. I am positive that we are all going to learn a lot from this experience.
You can see our profile on the CAP website by clicking here and see all of the other teams and past participants by clicking here.


The tale of two bowls
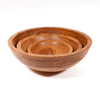
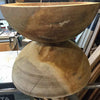
This morning I checked on some roughed out bowls that I had set aside to dry.- Kim Dailey
- Tags: blister maple bowl blister maple wood bowl blister maple wooden bowl bowl making bowl turning Bowls and Platters Carthage Carthage Maine carthage ME Carthage woodturner carved wood curly maple curly maple salad bowl curly maple wood bowl curly maple wooden bowl dailey woodworking etsy maine team Figured Maple fruit bowl hand turned wood salad bowl Kim Dailey Life in general made in maine maine maine made maine wood bowl maine wood bowl maker maine wood turner maine wooden bowl maine wooden bowl maker maine woodturner Maine woodturning maineteam making a bowl making a wooden bowl maple maple bowl maple salad bowl ME My Shop nested bowl set nested bowls nested set of bowls nested wood bowls nested wooden bowls salad bowl small business spalted maple spalted maple salad bowl spalted maple wood bowl spalted maple wooden bowl spalted maple wooden salad bowl spalted wood The Dailey Grind transforming a log turning a bowl wood bowl wood salad bowl wood turning wooden bowl wooden bowls wooden salad bowl woodturning woodturning in Maine

Recent experiments
Recently I've been experimenting more with stabilizing wood and also with dying wood during the stabilizing process. So far I've stabilized the following woods: Birdseye Maple, Box Elder Burl, Cherry Burl, Curly Maple, Maple Burl and Redwood Burl. I've dyed and stabilized the following woods: Box Elder Burl with the color blue and Curly Maple with the color green.
Stabilizing is a process where as much moisture is cooked out of the wood as possible and then the wood is put in to a vacuum chamber with resin. The vacuum pulls the air in the wood out of the wood and replaces it with the resin. If I want to add color to the wood I just mix the resin with a dye and then do the process of putting the wood into the vacuum chamber with the dyed resin. The wood is generally under vacuum for an hour or more and then left to soak in the resin (or resin and dye) for hours or sometimes a day or more. Once this part is done, I then take the wood out of the chamber and wrap the pieces in aluminum foil and put them in to the oven to cook the wood again. Don't worry, I have a separate toaster oven that I do this in and I don't use our kitchen oven for this process. After allowing the wood to cool sufficiently, I take off the foil and I'm ready to start the turning process with the stabilized wood.

From left to right in the picture above
Dyed Green Box Elder Burl t-handle bottle stopper and corkscrew combination
Dyed Blue Box Elder Burl t-handle bottle stopper and corkscrew combination
Dyed Green Curly Maple handle on the pizza cutter
Stabilized Birdseye Maple t-handle bottle stopper and corkscrew combination
- Kim Dailey
- Tags: Birdseye Maple blue Bottle Stoppers burl Carthage Carthage Maine carthage ME Carthage woodturner carved wood carving wood cherry burl cork stoppers curly maple Dailey Grind dailey woodworking Dailey Woodworking news dyed dyed blue dyed green dying and stabilizing wood dying wood Figured Maple green Kim Dailey Life in general made in maine maine maine made maine wood turner maine woodcarvers maine woodturner Maine woodturning maple maple burl My Shop pen turning pizza cuttah pizza cutter Pizza Cutters - Pizza Wheels pizza wheel stabilized wood stabilizing wood stoppers The Dailey Grind wood wood carving wood carving in maine wood turning woodcarving woodturning woodturning in Maine

New color combinations for the Ferris Mini-Grinders
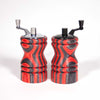
It's been a while since I have added any new color combinations to the Ferris mini-grinder line. So let's change that right now. Below are pictures of the new color combinations. I hope that you like them and if you want more information on any of them, just click the picture and they will magically transport you to their page. Alright, so it's not really magic, it's actually hyperlinked pictures but the magic thing sounds a lot cooler.
If the color combinations are listed as limited edition and you like the way that they look then you shouldn't hesitate to order them. When they are gone they probably won't be back again, at least not before Labor Day. Some combinations I'm testing out and others simply won't be back.
- Kim Dailey
- Tags: Carthage Maine carthage ME Carthage woodturner Dailey Grind dailey woodworking ferris mini-grinders Kim Dailey made in maine maine made maine woodturner Maine woodturning Mills & Spice Grinders New Product pepper grinder pepper mill Salt and Pepper Mills The Dailey Grind wood turning woodturning woodturning in Maine


